Nov 13

Having run completely out of space, I was all ready to start my next array with 2TB hard drives. Surprisingly, the same day, I read on Engadget that Western Digital had started shipping 3TB drives.

With the cost overhead of housing each drive, and the limit on the number of drives I can accomodate, using the highest capacity drive available for an array is the best option.

Now, I haven’t yet explained how My NAS Server 2 evolved, but to give you a sneak-peak – it uses SATA port-multipliers. This brings me to the point of this post…

The Engadget post regarding these drives seemed to indicate there could be some issues seeing all the space without special drivers. After doing a bit of research, I think there is only a problem when you are trying to boot from the drive. As my NAS boots off a CF card, it’s a non-issue for me. More importantly, I read a conversation on the linux-raid mailing list which seems to indicate there shouldn’t be a problem with Linux, or the port-multipliers supporting these drives right out the box.

This is good news as I will be able to use them to build my next array. Unfortunatly, they are vastly more expensive than 2TB drives, and on top of that, they don’t seem to be available in the UK quite yet. Hopefully I will find a way round my lack-of-space until I can get my hands on a couple.

May 21

As promised, here’s my initial hardware for this NAS. Later posts will discuss how I went further and what hardware needed to change to accommodate.

Motherboard

A tough choice I had to make right at the beginning of the build list was the motherboard. I really wanted something with at least 8 SATA ports, two PCIe x 4 slots and integrated graphics. The two PCIe slots with 8-port SATA cards, plus the 8 on-board ports would have given me 24 ports total, enough for 2 x 12 disk arrays. Not bad.

It turns out that 8 SATA ports is very rare, and the sort motherboard that has lots of PCIe slots doesn’t have integrated graphics. It wasn’t easy to make a short-list since there’s no site (that I could find) that compares all these features. Even manufacturers website don’t list the features side-by-side. I ended up just ploughing through the sites and noting down which ones were possibilities. Of course, cost played a big factor in my choice.

This is the motherboard I ended up with: Gigabyte GA-MA78G-DS3H. Bear in mind this was 18 months ago so it is probably a lot easier to find an appropriate choice now.

Features

  • Integrated graphics with VGA. VGA is important to me (as is PS/2) because it allows me to run it through a KVM switch with the rest of my servers. This motherboard also happens to have HDMI – talk about overkill for a headless server running a CLI.
  • Gigabit LAN. I expected all current model to have Gigabit LAN so didn’t worry about this when searching. Gigabit LAN is a must for a NAS, but dual-ports doesn’t help. It also happens to be on a PCI Express bus, so won’t clog up the internal bandwidth available like My NAS Server 1 did.
  • Three PCIe x 1 slots, two x16 length slots (electrically – one x16 + one x4) and 2 PCI slots. I only intended to use the x16 slots, and while the one that is actually x16 electrically is designed for a discrete graphics card, it seems to work fine with a SATA controller. That something you should verify before buying, as some motherboards have booting problems if there’s a non-graphics card in that slot.
  • Six SATA ports. Unfortunately I had to trade off the SATA ports for cost. There were a few that had 8 SATA ports, but not decent PCIe slots, and some that had both of those, but not integrated graphics. I probably could have got what I wanted for ~4x what I paid (~£70).
  • One IDE connector. I needed this for the boot disk using an IDE to Compact Flash adaptor.

Processor

I guess the reason I chose AMD over Intel was the cost. There were a couple of options for both, and I’m happy either way, so really, it just came down to the price. AMD systems (in my experience) tend to be cheaper. There’s no` need for a really fast processor in a dedicated NAS, as there will be other bottlenecks (the LAN connection). Quad-core doesn’t help as Linux-RAID isn’t multi-threaded, but dual-core has it’s uses because the second core can deal with network protocols and other overheads that go with filing.

That made it an easy choice – dual-core and the best value in terms of megahertz. I wasn’t bothered by power-consumption so ended up with a 2.6GHz AMD Athlon 64 X2 5000+. 64-bit was essential due the XFS volume size limit mentioned in My NAS Server 1, but pretty much all CPUs are 64-bit now, anyway.

Memory

RAM is pretty cheap, so I went for 4GB of bog-standard stuff. You don’t need much RAM to run a NAS (Linux), but having a bunch spare allows me to put some temporary filesystems in RAM which reduces wear on my CF card.

Power Supply

A bit of a tricky choice for me. Do I cheap-out and go for more than one again, or get something a bit more expensive? Well, based on the fact that a bunch of separate PSUs didn’t work out too well for me before, space was limited and I wanted something rock-solid, I splashed out and got something substantial. At over £130, the OCZ 1000W EliteXstream was exactly that. I needed something with huge amounts of 12V current in order to power-up loads of drives (around 22) without staggered spin-up.

Many PSUs have a high amount of 12V current available, but also come with a special ‘feature’, namely split-rails. In reality this is a huge con and doesn’t provide any stability as implied. All (well, the vast majority) of PSUs with split-rails aren’t split at all. They only have one transformer for 12V, and merely put a current-limiter on each output. So if you have a PSU that claims to have four 20A rails, it’s really just one 80A rail (although sometimes it’s even less, and they don’t let you use all four to their maximum rating concurrently – another con) with four current-limited outputs.

This was really annoying for me, as I wanted all the current to be available to the hard-drives. When it is split, you find most of the current goes to PCIe connectors intended for power-hungry graphics cards. That’s not what I wanted and would have required some quite dodgy creative wiring. I was left with very little choice, but the 80A single-rail OCZ had good reviews and I’ve been very happy with it.

Hard Drives

I started with 4 x 1.5TB drives. I believe that was the largest capacity available at the time, and when you factor in the cost-per-port on the host, it makes sense to go for the largest size available, even if the cost-per-gigabyte isn’t quite as good as lower capacity drives. You must also remember that by the time you expand the array to its full size, the cost of each drive will be significantly lower, and most likely excellent in terms of cost-per-gigabyte. In a way, I suppose that may be a disadvantage of this sort of RAID set-up.

Having only 4 HDDs to start with, I didn’t need to worry about getting any SATA controllers for the moment. Quite glad I could put that off for a while, as it was my intention to get 8-port cards but they’re a bit pricey.

If I’ve forgotton anything, or you want some clarification on something, leave a comment and I’ll do my best to answer it.

May 19

When I started this NAS, I thought I was going to be using something like the Norco RPC-4020. This is a sever case with 20 hot-swappable SATA bays, so it’s an ideal form factor for a NAS.

Having been made aware of it on a US forum, I encountered the dollar price at first. Typically around $280 (~£190) I thought it was quite a good deal. I searched high and low for it in the UK, but no-one seemed to stock it. I did manage to find a site selling what seemed to be the same hardware, but re-branding it as their own. To my shock and horror it was in excess of £350.

I went back to the US sources to see if it was plausible to import one. A site I found, along with a few eBay sellers would send it across the Atlantic, but that would cost as much as the case itself. By the time you’ve added VAT to the price on import, it ends up being more or less the same price as the UK website.

There were a few people at AVSForums trying to organise a bulk-buy to get the price down, but when that came to nothing, I thought I’d contact Norco myself. It turns out that the wholesale price was just $10-$20 lower than the retail price at places like Newegg.com. I don’t know why they had such a slim margin on it, maybe they used it to get customers to buy the PC hardware and hard drives at the same it. This pretty much made me give up hope on a decent rack-mount case with hot-swap bays.

Getting desperate for space, I went to the easy solution. I had found a cheap 4U case that holds up to 11 hard drives, plus I could get hold of it fairly quickly. It was even on offer at the time (~£5 off), although now it looks like the regular price is less than what I first paid anyway.

My next post in this series will discuss the hardware I put in the case.

May 16

After starting the series of posts My NAS Server 2, I thought I should take a few moments to write about the experiences of my first NAS server. It should help justify the decisions I made with second NAS you may otherwise have thought I’ve overlooked. I felt it would be sensible to go down the route of a NAS after I filled up my first 1TB external hard-drive very quickly.

Please bear in mind I wrote this as a collection of thoughts and memories from the last three years – it may not all be coherent.

Type of set-up

Originally, I thought there were two routes I could go down:

  1. Pre-built NAS device.
  2. Build-you-own NAS.

I pretty much instantly ruled out option 1 due to cost. The price of these devices (e.g. Drobo) was extortionate compared to using a low-spec PC. Pre-built devices do have their advantages, e.g. being quiet and stylish, but I am fortunate enough to be able to hide mine away in the loft, so those don’t matter to me. Once I had decided to build a NAS, one of the early decisions was…

Hardware or software RAID

Some of you may be thinking “Hold on, why are you jumping into RAID at all?”. Well I’m afraid I don’t really have a very good answer to that – It just ‘made sense’ to me. If you really want a reason, how about it gives you a single volume?

Before I explain my reasoning, let me just get ‘fake-RAID’ out of the way. Some people think they have free hardware RAID built into their motherboard – this isn’t wholly correct. While RAID 0 and 1 (and maybe even 0+1) can be handled in the motherboard hardware, RAID 5 or 6 never is. It actually uses a software layer running in Windows to handle the parity etc, which eats CPU cycles. That is why it is fake-RAID, and I’m ruling it out.

So now I’ve got two real choices, which is the best? For me, software RAID. Why? Cost. Hardware RAID controllers are very expensive and are limited in the number of drives they support. As far as I’m concerned, hardware RAID is for enterprise where price is a non-issue and performance is everything. This server was for cheap, mass storage.

Another problem with hardware RAID is that if the controller dies, your array goes with it. It may be possible to replace the controller with one of the exact same model and firmware to get the array back up, but there’s no guarantees, and again, it’s very expensive. Plus, by the time the controller breaks, you probably won’t be able to get another one the same, because they’ll have been replaced with newer models by then. Ideally, you’ll buy two from the offset and leave one in the box on a shelf – very expensive.

Software RAID allows for any hardware, and even a complete change of hardware while keeping the array intact. This makes it very flexible and a good choice for me. Now on to the variants…

unRAID

unRAID is a commercial OS that you put on your PC to turn it into a NAS. It’s designed to run off a USB stick, so that saves a SATA port but it has its limitations. When I built my first NAS, I believe there was a maximum of 10 (or so) drives allowed in an array. Now it looks like they have a ‘Basic’ version (free) that supports 3 dives, a ‘Plus’ version ($69) with up to 6 drives, and a ‘Pro’ version ($119) that supports 20 drives. The main feature of this OS is that it provides redundancy, but allows different sized drives. Quite nice for some people, but not what I want or need. Add to that the price and I’m not interested.

FreeNAS

This was actually my chosen option to begin with, but I didn’t stick with it for long. Again, this is a pre-configured OS designed to go on a memory stick. It has the advantage of being free and easy to configure. Unfortunately, I had very little success when using it to create a RAID – it was too unstable and hence unusable. On top of this, I don’t think it even supported RAID 6.

Linux-RAID

Configured with mdadm, this is the option I turned to when FreeNAS failed me. You can use it on any flavour of Linux – I went for Ubuntu Server as it was a popular choice at the time and was well supported. I decided not to use the desktop version not only because, well, it’s a server, but there was no need for the overhead of a GUI that I would never see. It’s also true that most of the configuration isn’t possible through a GUI, so I’d have been firing up the CLI either way.

Linux-RAID is very advanced, stable and flexible. It’s easy to add drives and supports RAID 5, 6 and more. That makes it the perfect choice for me. While it’s designed to be run off a normal hard-drive, it can be run off a USB stick. I chose to use a compact-flash to IDE adaptor as this kept the SATA ports free and solid-state memory tends to be more reliable than mechanical hard drives. I just want to point out at this point, even if the OS did become un-bootable, it doesn’t matter to the array in an way, and it can be re-assembled by any other variant of Linux – even a live-CD.

Windows / Home / Server

No thanks. OK, I’ll elaborate – I don’t trust it, I don’t like it. What, you need a better answer? Fine…

Windows has limited RAID functionality so that kills it right there. It does have a ‘duplication’ utility where it will make a second copy of selected data, but that doubles the space required for where you want redundancy. It’s quite good in that it will manage your data across multiple drives, but I’ve already decided to take a proper RAID approach. Also, you start running into problems if you have large filesystems. You need to ensure you set appropriate cluster sizes etc. Not sure if you can add capacity on-the-fly, either. Think I’ll give that a miss.

ZFS

This wasn’t really an option back when I constructed my first NAS but I’ll talk about it here for the sake of completion.

ZFS is a filesystem designed by Sun and includes the option of redundancy. It’s free to use and runs on OpenSolaris and a few others. Running only on those OSs, the hardware support becomes limited, which is not great when you’re trying to use (unbranded) consumer hardware to keep costs down. But that’s not the only problem with it. ZFS’s redundancy is called ‘RAID-Z’, which to all (our) intents and purposes is the same as RAID 5. There’s also RAID-Z2, which is equivalent to RAID 6. The problem with this, is you can’t expand the capacity once it’s been created. I would probably recommend ZFS if your hardware happens to be compatible with OpenSolaris and you know for sure that you don’t want to change the capacity of your NAS. Something tells me that’s not a common starting point, which is a real shame. Note: expanding the capacity of a RAID-Z pool is a feature expected to be added to ZFS in the future, so it won’t be useless forever.

Hardware

With the point of the server to be cheap, I ordered two basic PCs off eBay for <£100 each, rather than specing out a new PC. On top of that, I got a 128MB USB key (as I intended to use FreeNAS) and a Gigabit LAN card. After low success with that hardware, I ended up buying  a used Motherboard + CPU (3GHz P4) + RAM from a friend for £90. It had built-in Gb LAN, 5 PCI card slots and 4 on-board SATA ports. Using 5 x 4-port SATA cards, I gained a total of 24 SATA ports.

This wasn’t a particularly bad set-up. It gave reasonable speeds of 40MB/s up & down over the network. Bearing in mind the Ethernet port was on the same bus as the SATA PCI cards (133MB/s theoretical maximum), it’s pretty much as high as you could expect.

As for casing and powering 24 drives – that was a little tricky. Casing turned out to be pretty hard – there aren’t really any hard drive racks with a reasonable price-tag. In the end I decided to build my own. All it consisted of was two sheets of aluminium with the drives screwed between them and a few fans attached. Here’s a picture:

Hard Drive Rack

DIY hard-drive rack.

For powering the drives, I could have tried one humungous supply, but firstly they’re very expensive and secondly, I’m not sure you can even get one that will do 24 drives. Powering on 24 hard drives at the same time can use up to 70A of 12-volt current and a huge amount of sustained 5V. Ideally you’d use staggered spin-up, but this is only a feature of high-end SATA cards and doesn’t work with all drives anyway. I went for powering 4 hard drives off each PSU which meant I needed 6 in total (plus one for the system). At only ~£5 each, it was still a really cheap option. Check this post for how to power-on a PSU without connecting it to a full system.

The full list with prices can be found in this Google Spreadsheet.

Filesystem

Seeing as how I was using Linux, the obvious (and my) choice of filesystem was ext3. I didn’t really think too hard about it. Ext3 is a mature and stable filesystem which works very well under Linux. One of the most annoying things about that filesystem is that deleting a large number of files takes a (very) long time. It also has a maximum volume size of 16TB, not that that was a problem for this NAS. Another issue I found out later is that it reserves 5% of the space for system usage. When it’s not the boot volume that’s completely unnecessary, but there is a way to disable it when you create the filesystem (so long as you remember to).

When I switched from RAID 5 to RAID 6 (see timeline below), I took the opportunity to change filesystems. I looked at few recommendations for Linux including JFS, which is fast and stable but ultimately went with XFS. XFS has the reputation of being fast for large files which is appropriate for this NAS, as well as being very stable. The maximum volume size is 16 exabytes (on a 64-bit system) and you can grow the filesystem when you need to (although you can’t shrink it – not that I can see why you’d want to). It certainly sped up file deletion and I’ve not had any problems with it. A good choice for me.

A new option on the table is ext4. This wasn’t available when I built this NAS as it’s just recently been added to the kernel and considered stable. I have since used it in another server and it seems fine (it has the same space reservation issue as ext3) but I’m still not sure that it’s stable enough to trust with my data.

Around the corner is Btrfs. This is what could be described as Linux’s answer to ZFS. While they are both free to use, ZFS has licensing issues that makes it impractical to run on Linux (has to run in user-space). Btrfs is a while a way from being suitable for production use, but it’s one to keep your eye on.

Timeline

I set up the array with 8 x 500GB hard drives in RAID 5 – this gave me 3.5TB of usable space. As I wanted to switch to RAID 6 (due to the number of drives in a single array) I had to add another 8 drives at the same time when I first wanted to expand capacity. I created the RAID 6, copied the data from the RAID 5, dismantled the RAID 5 and added the drives to the new array.

Expanding the array wasn’t as easy as I had first imagined. Growing a RAID 6 array was quite a new feature at the time, and was not available in any kernel pre-compiled and packaged for Ubuntu Server. This meant compiling my own array which was an interesting endeavour. It worked out flawlessly in the end, but that’s getting a little off-topic. Anyone trying to grow a RAID 6 now shouldn’t have that problem as it’s been a standard feature of Linux kernels for a couple of years now. On top of that, it’s also now possible to convert a RAID 5 to RAID 6. This is a recently added feature so may be a little risky to try on important data. It also uses a non-standard RAID 6 layout, with the second set of parity all being on one (the new) disk.

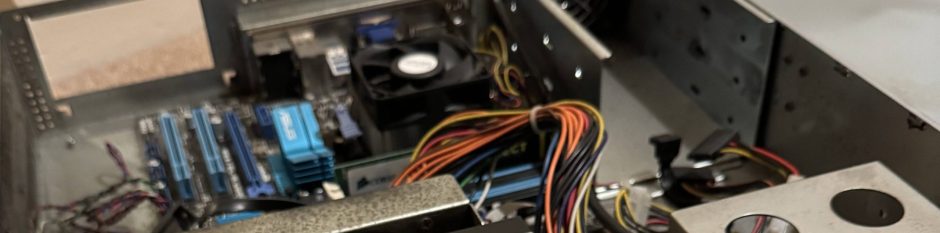
Once that capacity was used up, I added two sets of 4 disks and grew the array each time. This took me to a total of 24 x 500GB disks in RAID 6 – 11TB of usable space. All was well – here’s a picture of what it looked like:

NAS Server 1

My first NAS in its final state.

This is where I started to run into problems. Disks started to fail, which in it’s own right isn’t a problem, even two can fail so long as you can get them replaced (and re-built) before any others fail. But eventually I was in a situation where the array was degraded and could not assemble its self. I did manage to force the array back online after dding one of the failing disks to a new drive, but only long enough to get as much data off as I could fit on my new NAS. The disk I used as a temporary fix was actually out of the new NAS and when I replaced it with a 500GB one again, the rebuild failed. Instead of putting the new drive back, I decided to force the array back up by creating a new array with the components from the old array. I’ve probably lost some people – you’ll need some extensive experience with Linux-RAID to know what I’m on about. As this is a tricky and risky procedure, it didn’t work. The data was gone and I learned from my mistakes. The biggest problem was that I had no head-room in terms of connecting spare disks – all 24 SATA ports were used up with the single array. If I had put more time, effort and money in, I could have saved it. The hardware didn’t fail beyond all repair, I just didn’t choose the safest way to recover. 24 drives in one array is risky, will most likely provide you with headaches, but is certainly obtainable.

That marks the end of my first NAS, which brings us to My NAS Server 2.

May 15

If you’ve got too many hard drives or other components connected to your computer, you may need a second power supply. In order to turn it on without connecting it to a motherboard you have to ‘jump’ it. It’s a really simple process – all you have to do is connect the green wire to any black wire on the 20/24-pin connector.

You can get a small piece of solid core wire (or a paper-clip) and poke each end in, get some proper ATX pins and connect them to a short piece of wire or, if you don’t mind permanently ‘damaging’ your PSU, snip the wires off, strip the end and either twist or solder them together.

That was easy, wasn’t it?

May 14

Throughout this series of posts, I’ll be describing the specifications of my home network-attached storage server (NAS). Before I get to the details in later posts, I’m first going to set out what I’m trying to achieve.

  • Mass storage – I suppose this is the most important reason for the server. I want to have enough space for all my media.
  • Cheap – Well maybe not ‘cheap’ but from my perspective, at least ‘good value’. The original point of the server was to get the cost-per-gigabyte below that of external hard drives. With the added benefits of a NAS over a USB/FireWire drive, this becomes less important.
  • Easily expandable – With hard drive prices ever decreasing, I want to be able to add space when I need it – not all up-front.
  • Redundancy – Now, we all know that RAID is not a backup, but for my purposes, it will suffice. I don’t want lose all my data if one HDD dies, but the data isn’t important enough to make a separate copy elsewhere. It’s my experience that hard drives rarely fail beyond being able to get data off them, so if I have to spend a bit of effort recovering data and the rest of the data ins’t available while I go about this – no big deal.
  • Online – What’s the point of storing a load of media if you have to faff about in order to access it? I know a lot of people go about it this way, and it is certainly the cheapest, but it also bring about my last point…
  • Easily manageable – By this I mean I don’t want to have to keep track of where what is. That is to say, the less ‘volumes’, the better.

You might be wondering why this post is titled My NAS Server 2. Well, I’m actually going to be writing about my second NAS. I’ll take the opportunity to write about the experiances of my first NAS in the next post, which should give you some brief insights into how I arrived here, and the reasons behind some decisions I may overlook later on.

Mar 23

Here’s how to install AFP (Netatalk) on Ubuntu Linux with SSL for encrypted logins.

[code lang=”bash”]apt-get install cracklib2-dev libssl-dev devscripts
apt-get source netatalk
apt-get build-dep netatalk
cd netatalk-*
DEB_BUILD_OPTIONS=ssl sudo dpkg-buildpackage -us -uc
dpkg -i ../netatalk_*.deb[/code]

Now you should prevent it from being upgraded with either:

[code lang=”bash”]echo “netatalk hold” | sudo dpkg –set-selections[/code]

or:

[code lang=”bash”]apt-get install wajig
wajig hold netatalk[/code]

Don’t forget to edit your shared directories:

[code lang=”bash”]nano /etc/netatalk/AppleVolumes.default[/code]

You might also want to advertise the server with Bonjour. I followed these instructions.

Mar 23

Ever wanted to hide an individual file in Mac OS X Finder without prefixing it with a dot? Here’s how (you’ll need the Apple developer tools installed):
[code lang=”bash”]/Developer/Tools/SetFile -a V «filename»[/code]
…and to show it again:

[code lang=”bash”]/Developer/Tools/SetFile -a v «filename»[/code]

If you want the Finder to show all hidden files, use this command:

[code lang=”bash”]defaults write com.apple.finder AppleShowAllFiles -bool true[/code]

…and to hide them again:

[code lang=”bash”]defaults write com.apple.finder AppleShowAllFiles -bool false[/code]

You’ll need to relaunch the Finder after this. I can think of three ways:

  1. [code lang=”bash”]killall Finder[/code]
  2. The “Force Quit Applications” dialogue box
  3. Click and hold “Finder” in the Dock while also holding ‘option’.
Mar 23

I’ve created this space to share some of my personal projects and tips I find along the way. Plus, anything I have an opinion on.

preload preload preload